
|
Case window (Slick Style) This guide is a recreation of the many window mods out there. Except for a few differences like the logo. This guide is made for both the modding experts and even the newest of modder. Please make sure to take your time and plan out everything ahead of time.
Sorry about the lack of pictures and quality. But I hope this provides enough information and description to create you own window. The difference between this method and others case windows; is that I used no bordering materials. Such as the bolt mountings and rubber borders. It is a frameless window without the extras. Making it a simple and practical modification.
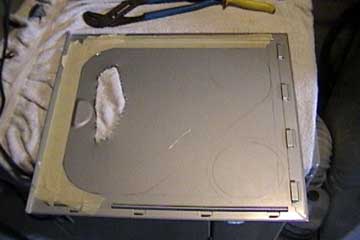
First Step: Draw the shape of your window on the inside of the case. Make sure you plan out the design and measure twice. Do not cut the window too close to the edge, this will weaken the strength of the window. Also give yourself at least 1 inch of extra space for mounting the plexy glass. Mark and cut only the inside of the case to help prevent damage and errors. Use the masking tape to help mark the case along the line. Notice: The purpose of the tape is also to prevent scratches and provide a stronger outline of the window.
Next Step: For those who never used a cut-off wheel before, I recommend not cutting directly on the line. Give yourself 1-2mm of space to practice cutting the metal. Notice: Cutting steel cases requires patients and practice.
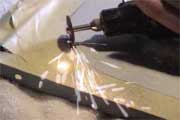
This is a short video to show you what cutting metal looks like. Notice: it is in DIVX format. If you don't have DIVX please download the video codex.
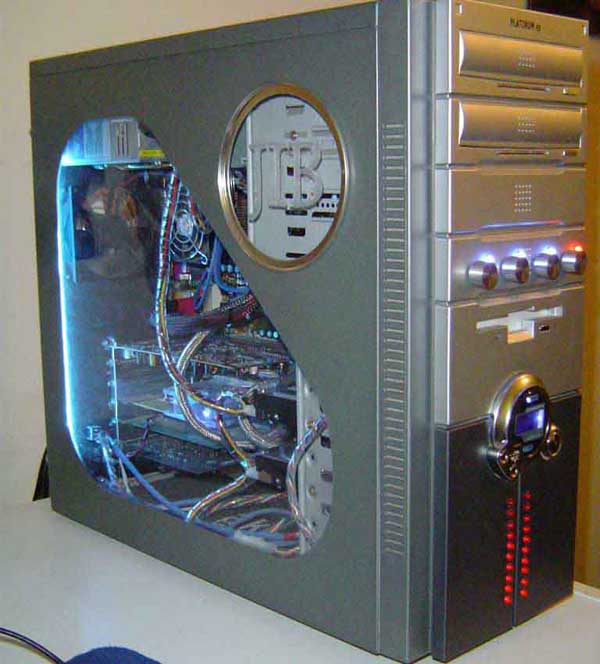
(1.15 MB Divx) Then: After the entire window is cut out, use the dremel cut-off wheel to take out the rough edges along the curves. Use the metal file to create a strait edge, and be patient because this part may take a long time. Prefection is almost achieved! My window has an extra circle which I cut out for my Logo and hard drive indicator. I used a metal rim from a lipton can, to create a nice frame. Unlike the main window which doesn't use a frame. Finally, now that you finished cutting and filing, you can cut out the plexy to the correct size. Give yourself 1 inch of room to have enough surface area to glue on. Using the silicon glue or clear expoxy, apply the window and apply pressure. Well thats all, your finished! Sorry again for the bad pictures, but I hope this can inspire you to create your own window. Note that my window is completely bolt free and has no ugly rubber framing.
|